Advance Guide on Exporting Code Signing Certificate (Windows)
As you install a Code Signing Certificate in any of your browser- Internet Explorer, Firefox, or Chrome, you may want it to use in another place. You may want to export the certificate to another computer or take a back up for the same.
Exporting Code Signing Certificate From Internet Explorer
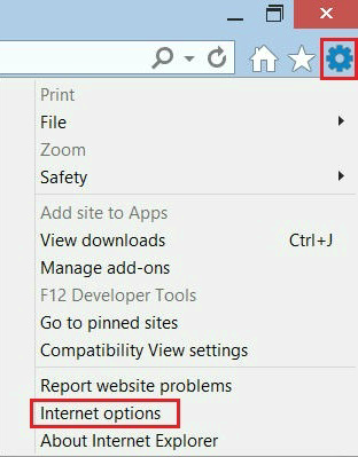
1. Open Tools on the Internet Explorer. Click on Internet Options.
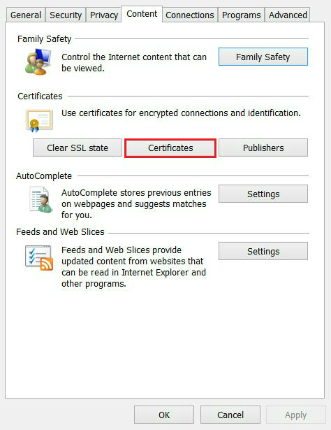
2. Click on Content Tab. Select Certificates
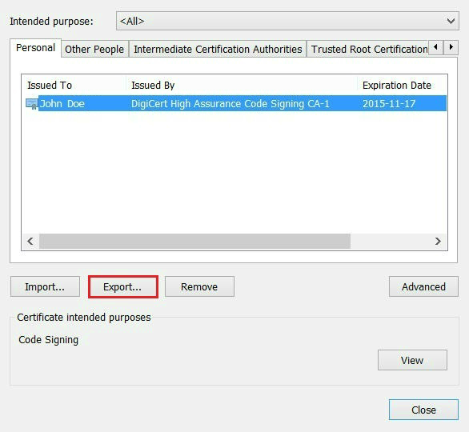
3. Click on Personal Tab in the Certificates Window. Select the certificate you want to export. Click on Export Button.
4. Click Next on the Welcome Page on Certificate Window.
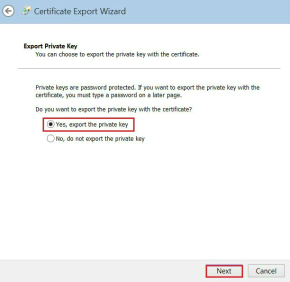
5. Select Yes, export private key on the Export Private Key. Then Click Next
6. On the Export File Formate page, click on Personal Information Exchange –PKCS #12(.PFX). Check the box on Include all certifications in the certification path if possible . Click on Next button.
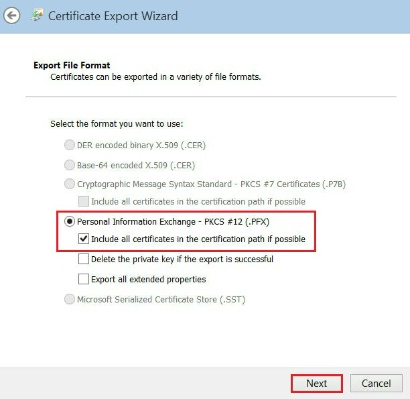
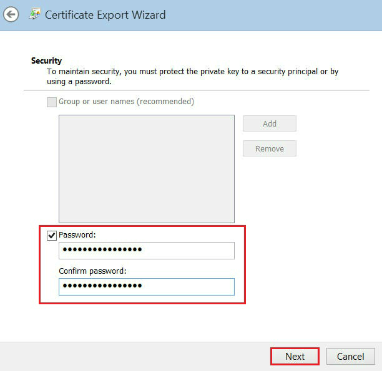
7. A Security page pops up where you may need to enterPassword Twice. Type your password and click on Next.
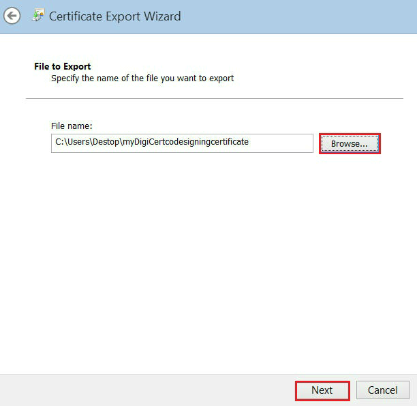
8. For the next step, you are welcomed on File To Export. Click on Browse button to select the location where you want to save your code signing certificate. Provide a file name and click on Save.
Your files are saved with .pfx extension. Make sure to save the file to the directory to which you have permission.
Click on Next
Note: A .pfx file is equivalent to the format as .p12 or PKCS12 file
9. Click Finish on the Completing the Certificate Export Wizard page.
10. Click Ok when you receive “the export was successful” message.
You can find your Code Signing Certificate in the Destination Directory which you selected in the last step of the wizard .pfx file.
How To Export Code Signing certificate as a PFX file from Chrome
1. Open Chrome. Go To Settings.
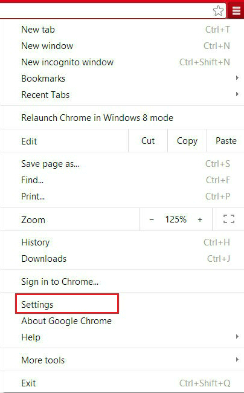
2. Click on Show Advanced Settings right under the Default browser option.
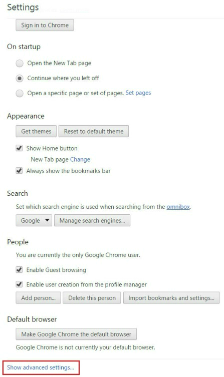
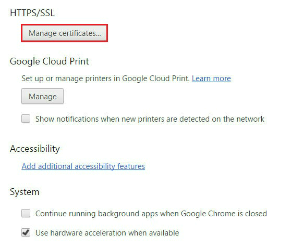
3. Click Manage Certificates under HTTPS/ SSL
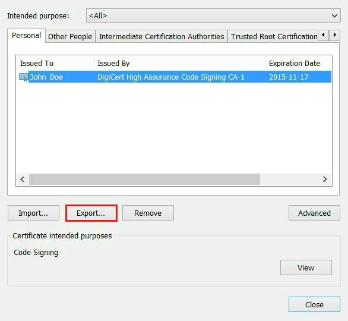
4. The Certificates window pops up. On the Personal Tab, select your code signing certificate. Click on Export button.
5. Click on Next on the Certificate Wizard Welcome Page.
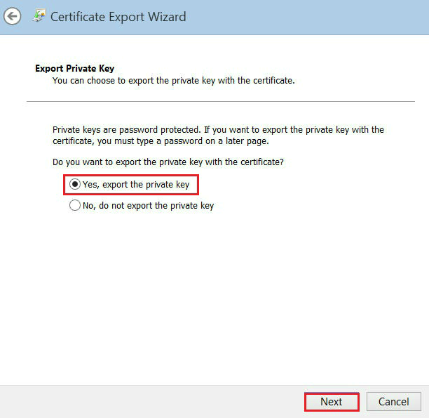
6. Click on Yes, export the private Key on the Export Private Key Page. Click Next.
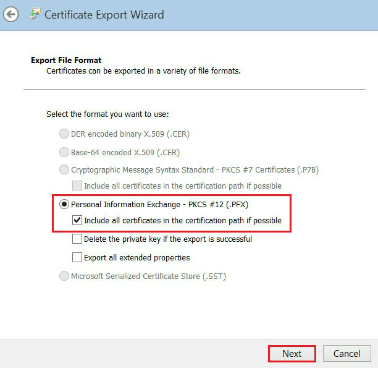
7. As the Export File Page opens, select Personal Information Exchange-PKCS #12 (.PFX). Check the Include All Certificates in the certificates path if possible . Click on Next.
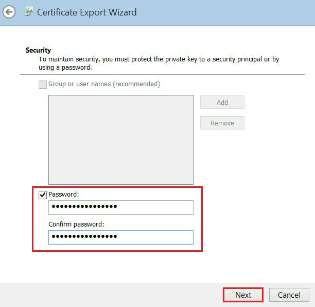
8. On the Certificate Export Wizard page, enter Password. You may need to enter Password twice for confirmation. Click on Next.
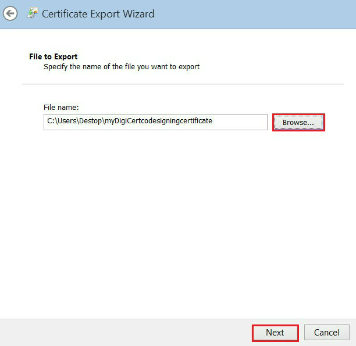
9. The File to Export page asks you to Browse and select the location where you want to save your code signing certificate. Provide a file name and click on Save. The File is saved with.PFX extension. Click Next.
Make sure to save the file in a location that you can remember and have permissions.
Note: A .pfx file uses the similar format as a .p12 or PKCS12 file.
10. Review your settings on theCompleting the Certificate Export Wizard page. Click on Finish.
11. The pop-up window shows “the export was successful.” Click Ok.
You can now find your code signing certificate in the Destination Directory with .pfx as an extension name.
How To Export Code Signing Certificate as a P12 File from Firefox
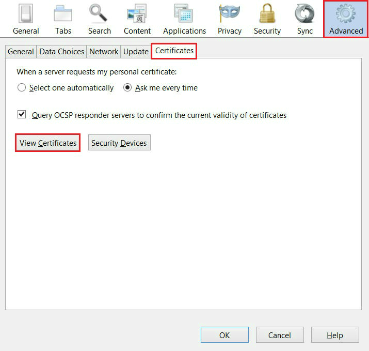
1. Open Firefox. Click on Tools. Click Options.
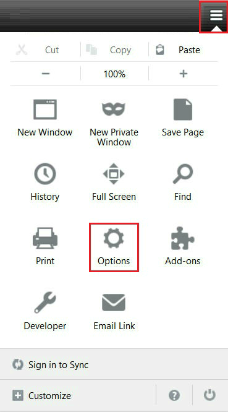
2. Select Advanced and click on Certificates Tab. Click View Certificates .
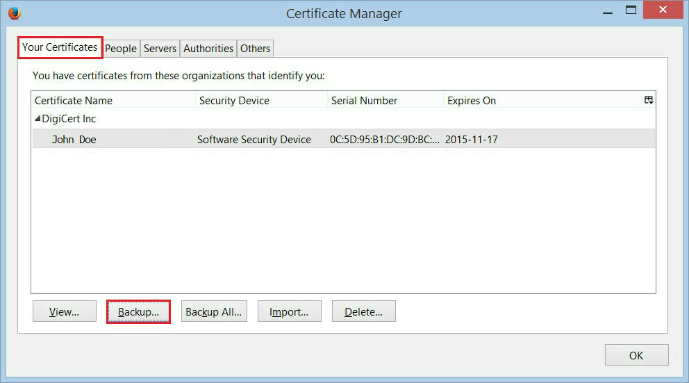
3. Click on Your Certificates tab in the Certificate Manager Window. Select your Code Signing Certificate and click on Backup Button.
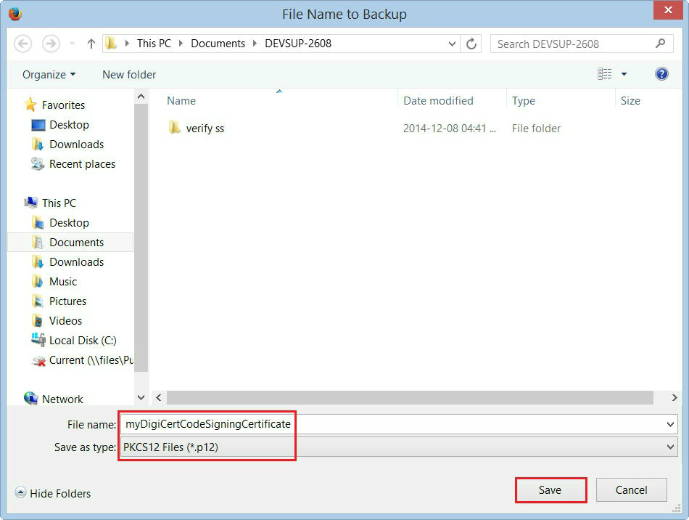
4. Enter the file name in the File Name to Backup window. Select the location you want to save the code signing certificate and click on Save. The files are saved with .P12 extension.
Make sure to save the file to the location that you can remember and you have permissions.
Note: A .p12 file uses similar format as a .pfx or PKCS12 file.
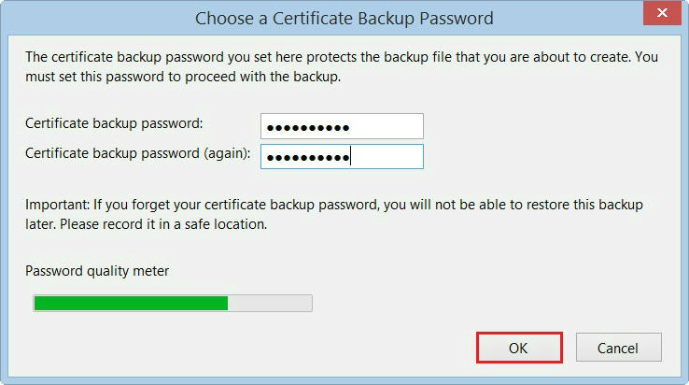
5. Create a Certificate Backup Password in the Choose a Certificate Backup Password. Re-enter the password to confirm. Click OK.
6. On receiving the “Successfully backed up your security certificate(s) and private key(s)” message, Click Ok.
Your code signing certificates are available in the Destination Directory with .p12 extension.
FIPS-140 Level 2 USB or Existing HSM
Stored on an External Physical Device
3 to 5 Business Days
